I recently posted a new video lecture on Amenorrhea for the 3rd year medical students.
I could have hired a video production company for tens to hundreds of thousands of dollars, and a year later, I’d have my Amenorrhea video lecture. Instead, I chose to produce it myself, at a cost of almost nothing. It took a couple of days of time, spread over a month to complete the video, start to finish.
I’d like to walk you through the basic steps I followed for this video lecture making, from scripting and editing, to the recording, and finally to post production, where the video is finally assembled.
Recruiting an Expert
A couple of months ago, I was running an OSCE and was in the “Control Room” watching different scenarios play out via audio and video feeds from individual rooms. I struck up a conversation with one of the faculty volunteers, who was providing the “voice” for one of the manikins. Dr. Shweta Nayak is a very nice attending OBGYN, boarded in Reproductive Endocrinology and Infertility.
Our discussion ran to the science of learning off screens, and I told her of my experience in creating a virtual M3 OBGYN rotation. I was pleased to have many good video lectures, but lamented the fact that I was still short on some important ones.
What are you missing? she asked.
I’m missing a lot of REI-related topics, like amenorrhea and infertility.
I’d be happy to help you with those, she volunteered.
OK. That would be terrific. I’ll email you with the details about how we proceed, but I think it will be fun for you. Let’s do it.
I had secured my expert. She seemed enthusiastic, personable, and willing to help, the three essential elements for a subject matter expert.
Selecting a Topic
It’s quite easy to make a huge mistake at this point.
The goal is to have the video lecture cover all the important material for a topic in 15 minutes or less. Longer than that, and you will start to lose people, and even 15 minutes is too long for many engaged in on-screen learning.
If you make your topic too broad (eg “The History of Mankind”), it will be impossible to create a short video lecture that is anything other than laughably superficial, of value to virtually no one. It might provide some light entertainment, but it certainly won’t be educational.
If you make your topic too narrow (eg “The Transformation of Cells through the Interaction of SV40 TAg with pRb via the Leu – x – Cys – x – Glu motif”), you will spend a lot of time creating a product that is of value to very few people. If you are trying to cover a given knowledge base, it will take hundreds or thousands of these narrowly-drawn topics. This becomes unmanageable from a learning standpoint, and consequently ineffective from an educational standpoint.
In my medical specialty, we have a number of potential sources for medical undergraduate learning objectives, which can serve as the basis for a lecture topic. Among the better ones are those from the Association of Professors of Gynecology and Obstetrics (APGO).
Among the eight “Units” for undergraduate training, is “Unit 4: Reproductive Endocrinology, Infertility and Related Topics”, encompassing:
- Puberty
- Amenorrhea
- Hirsutism and Virilization
- Normal and Abnormal Uterine Bleeding
- Dysmenorrhea
- Menopause
- Infertility
- Premenstrual Syndrome (PMS) and Premenstrual Dysphoric Disorder (PMDD)
In looking further into “Amenorrhea” they list specific learning objectives:
- Define Amenorrhea and Oligomenorrhea
- Explain the pathophysiology and identify etiologies of amenorrhea and oligomenorrhea, including possible nutritional causes
- Describe associated symptoms and PE findings of amenorrhea
- Discuss the steps in the evaluation and initial management of amenorrhea and oligomenorrhea
- Describe the consequences of untreated amenorrhea and oligomenorrhea
Based on all of this, I had Dr. Nayak pick the topic she most wanted to do first. She picked “Amenorrhea”.
Developing the Script
Nothing would preclude anyone from writing a brand new script on any topic. But it’s a lot easier if you have something you’ve already written that covers the material.
Dr. Nayak had previously given student and resident lectures on Amenorrhea at other institutions, and had both a detailed handout and a PowerPoint slide presentation. I used these as a starting point.
Amenorrhea PowerPoint Presentation Amenorrhea
The handout was well written and seemed complete. But if we were to take the handout and start reading it aloud, it would make for a terrible sound track. There needed to be some modifications.
- The handout is too long (3145 words). It needs to be trimmed down. The target size, when produced, is 15 minutes or shorter.
- The handout contains tables. These need to be removed from the script, but they can be added back in later as a visual.
- The handout is written in conventional written language. This needs to be modified to conversational language, removing lengthy or complex sentences and replacing them with shorter, more manageable sentences.
- The handout needs to be reformatted into columns (i.e., much wider margin) and with larger fonts to facilitate reading. Trying to read an entire page width during a recording session is difficult because the eyes tend to skip lines. Column reading is much easier (smoother, fewer mistakes).
With these issues in mind, I edited down the handout into a usable script form.
If you review the script, you’ll notice I still have the APGO Learning Objectives listed at the top, for internal reference only. These are not recorded, nor are they listed later.
You’ll also notice heading for each major subtopic. These, too, are for internal use only, to keep track of where we are. These are not recorded, but are preserved for the written script, published with the video lecture.
We also included the references, although they are not recorded. Instead, they appear at the bottom of the “Amenorrhea” page that contains the final video lecture product.
After completing the editing, I sent the script back to Dr. Nayak, for her own review. This is the final quality control, to make sure I didn’t edit out something important, or mis-state the point she was trying to make. From here, we moved to the recording session.
Recording Session
I’ve used recording studios in the past with good results, but nearly as good results can be obtained by creating a studio-like environment and using good equipment.
For convenience, I brought my recording equipment (two backpacks full) to Dr. Nayak’s office one afternoon. We spent about an hour and a half to set up the equipment, test it, and record her speaking the script.
The equipment consisted of:
- Shure SM7B Microphone, perched on top of a desktop tripod, and connected with a conventional audio cable to a
- M-Audio MobilePre preamplifier, connected through a USB cable to a
- Apple MacBook Pro laptop computer, running Audacity as the audio recording program. Audacity is a free, open source program with a proven track record for quality, simplicity, and functionality.
- AKG K271 MKII studio grade headphones that I wore during the recording, so I could listen to what the laptop was recording.
- Sony MDR-V600 headphones for Dr. Nayak to wear during the recording, so she could hear what her voice was sounding like.
- Olympus LS-10 Linear PCM Recorder was used continuously as a backup, in the event the primary system were to fail.
We did the recording in her office, which was private and acoustically neutral, with her door closed. She sat in her normal desk chair, and I sat across the desk from her.
Once we had tested the system and the sound levels were good, I recorded 30 seconds of silence in the room. Of course, no room is totally silent…there are very quiet hums and hisses from the ventilating equipment, and sometimes from overhead lamps. I would later use the “silence” to represent the constant background noise, that I would electronically remove or neutralize from the sound track.
The tone of the Dr. Nayak’s voice was intended to be conversational, as though she were making an informal presentation to a group of five students. As she had not previously been in this kind of a recording session, I explained some ground rules.
- If she makes a mistake, don’t apologize, just pause and start over from the beginning of the sentence. I’ll edit out all the mistakes later, but it’s easier to edit if she starts fresh at the beginning of the sentence.
- I may interrupt her and ask her to begin the sentence again, if I think it needs redoing.
- I may interrupt her for other reasons (three times we had to stop to allow an elevated train to pass by).
- When speaking, she needs to position her mouth as close to the microphone as she can, without actually touching the spit shield. The closer she is, the stronger the audio signal is, relative to the surrounding “noise”, and it makes for a better, clearer recording. I sometimes had to remind her to keep close to the microphone.
- If she ever is dissatisfied with how the script is reading, she should stop, cross out that part, and write into the script the way she wants it to go. When you are pacing your speaking according to the script, it will usually disrupt that pacing if you have to try to remember how you wanted to change a sentence. Better for it to be written down.
Audio Post Processing
Here’s a clip of the raw audio collected at the recording session:
Here’s the same audio clip after post processing:
The differences are these:
- The volume has been “normalized” to be constant throughout the playback.
- The background noise has been electronically removed.
- All sound between sentences has been removed (so you don’t hear the deep breaths).
- All extraneous discussion has been removed.
- The space between sentences has been shortened and standardized, so a consistent, quick pace is maintained.
Collecting Images and Graphics
If I were making a video for internal use only, where I would personally be presenting the material, “Fair Use” provisions of the copyright laws would allow me to use virtually any graphic, for educational purposes.
But because I intended to distribute this video over the internet to anyone in the world who had an interest in it, I’ve restricted myself to images that I own (personal photographs, or those obtained following an appropriate release), or those in the public domain.
This meant that I couldn’t just automatically take all the images from Dr. Nayak’s PowerPoint presentation, but would need to use those which she personally owned, or I personally owned, or those in the public domain. I had no trouble finding good images through Wikipedia (and Wikimedia) (Creative Commons Licensing), or official US Government sources such as the CDC and NIH (public domain)
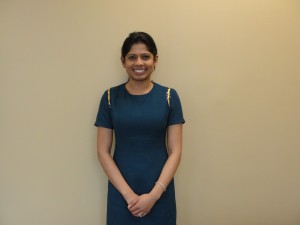
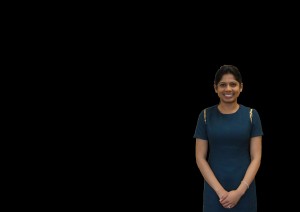
I also needed some photographs of Dr. Nayak I could use to insert periodically into the lecture as an “Avatar” to strengthen the effectiveness of the presentation. I took a number of photographs of her in her office, then selected the best, removed the backgrounds (I used Microsoft PhotoDraw, an old but usable image processor. Photoshop can do the same thing), and inserted them into the video track.


Adding the Video Track
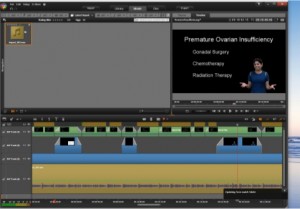
Using the processed audio for the audio track, I then layered images, graphics and text on top of the audio, using a video editing program, Pinnacle Studio.

I followed the eLearning best practices for visual content.
- Plain black background
- Simple title and bullet points
- Graphics support the audio, and are not in conflict with it
- No single sentences
- No motion
- Consistent format, fonts, positioning, etc.
Then I sandwiched the content between my standard lecture lead-in and closure. I exported the video in MPEG-2 format (DVD quality), and uploaded the file (209 MB) to my Vimeo account.
I use Vimeo as a cloud platform to host all of my videos, because vimeo will stream the video to users, optimizing the video resolution, format, and speed of transmission to match the user’s platform. Vimeo knows that someone is watching on a desktop, vs a tablet, vs a cell phone, and adjusts accordingly. The Vimeo stream can be embedded on any webpage and can be easily downloaded.
Amenorrhea from Michael Hughey, MD on Vimeo.
Creating a Web Page for Video Lecture Viewing
Since this video lecture was created for my simulated M3 (introductory OBGYN) clinical rotation, I opened the OBGYN Morning Rounds site.
This website was constructed using a WordPress format, a simple method of creating and maintaining a site.
I added a webpage (Amenorrhea), embedded the video lecture in it, and also included the script, for those who would prefer quickly reading through the material.
So that’s the process. I apologize for the lengthy and possibly over-detailed description, but I wanted to be able to walk you through the creative process, not leaving anything out.
